
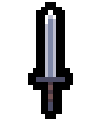


Swift Regret Greatsword Build

A normal-attack Greatsword route that repeats the final combo hit, then layers crowns, attack speed, physical damage and critical damage.

BUILD LOADOUT

Swift Regret final-hit route

Read in order: character, talent points, weapon route, then Artifacts and Combo targets.

Available loadout
01

Character

Adventurer Bunny or Braided Hair Rabbit

Adventurer Bunny in-game pixel portrait
Primary characterUse thisAdventurer Bunny

Extra dash capacity helps create the window needed to finish the full normal-attack string.

Braided Hair Rabbit in-game pixel portrait
Attack-speed alternativeAlternativeBraided Hair Rabbit

Use its Attack Speed and Move Speed when reaching the repeated final hit is the main constraint.

02

Talent points

20 Swiftness, 20 Wrath, 10 Ingenuity

Site recommendationUse this20 Swiftness, 20 Wrath, 10 Ingenuity

Reach the finisher faster, increase its damage and improve reward consistency.

Safer alternativeAlternative20 Endure instead of 20 Wrath

Use when taking contact during the long normal string is ending runs.

03

Weapon route

Steel Greatsword to Swarming Shadow to Swift Regret

Steel Greatsword weapon icon
Tier 1Use thisSteel Greatsword

Commit to normal attacks rather than building around Whirlwind.

Swarming Shadow weapon icon
Tier 2Use thisSwarming Shadow

Trade a slower Whirlwind charge for stronger Basic Attack Damage.

Swift Regret weapon icon
Tier 3 endpointUse thisSwift Regret

Repeat the final normal attack two additional times and increase Normal Attack Damage.

04

Artifacts and Combos

Dual crowns, then Firmness, Wind Song and Precision

Crown of Humility Artifact icon
Final-hit coreUse thisCrown of Humility

Strengthen the repeated final hit of the normal-attack combo.

Golden Crown of Arrogance Artifact icon
Normal-attack coreUse thisGolden Crown of Arrogance

Pair with Crown of Humility before adding luxury critical payoffs.

Wings Artifact icon
Attack-speed supportBuild toward thisWings

Build attack speed so the repeated finisher lands more often.

Sword Training Manual Artifact icon
Attack-speed supportBuild toward thisSword Training Manual

Use alongside Wings when improving the finisher cadence.

Windgrass Scarf Artifact icon representing Wind Song
Combo foundationBuild toward thisFirmness and Wind Song

Use survival and attack-speed components that help the full normal string connect.

Tainted Bandage Artifact icon representing Precision
Later ComboAlternativePrecision

Add after the dual crowns and attack-speed foundation are complete.

Unspecified slotNot specifiedRemaining bag slots

Fill with Normal Attack Damage, Physical Damage, attack speed and enough defense to finish the combo.

BUILD SNAPSHOT

Route plan

01Finish the normal string

02Build attack speed before luxury critical damage

03Use dash to create the finisher window

Use the finisher, not a DPS promise

This route starts from a pre-1.0 recipe. The current weapon still repeats its final Normal Attack, but the old performance claims are not a current clear benchmark. Build the crowns and enough attack speed to finish the string safely.

Route plan

Swarming Shadow gives up Whirlwind speed for stronger normal attacks. Swift Regret then repeats the last normal hit twice, turning the full combo into the route's payoff. The dual crowns reinforce that normal- and final-hit identity.

  • Finish the normal string
  • Build attack speed before luxury critical damage
  • Use dash to create the finisher window

Pickup order

Secure Swarming Shadow and at least one crown before overcommitting. Finish Swift Regret, complete the dual-crown pair, then add attack speed and Firmness or Wind Song support. Precision is useful after the normal-attack engine already functions.

How to play it

Start the combo only when the final swing can land. Use a dash to cross an attack line, face the densest part of the pack and commit through the repeated finisher. Cancel early when the window closes; preserving the run is worth more than forcing one incomplete combo.

Stat priorities

Attack speed comes first because it shortens the route to the repeated final hit. Add Normal Attack Damage, Physical Damage and Weapon Damage next. Critical Damage is valuable when the current bag already provides reliable critical conditions.

When to pivot

Do not force the build when Swift Regret or both crowns miss. Swarming Shadow can still support a general normal-attack Greatsword, while an early Hypersensitivity offer is a clean pivot into the Whirlwind route.

Sources